
Getting Started with Astrophotography
Would you like to capture images of stars with your camera? Read on to learn more about getting started with astrophotography.
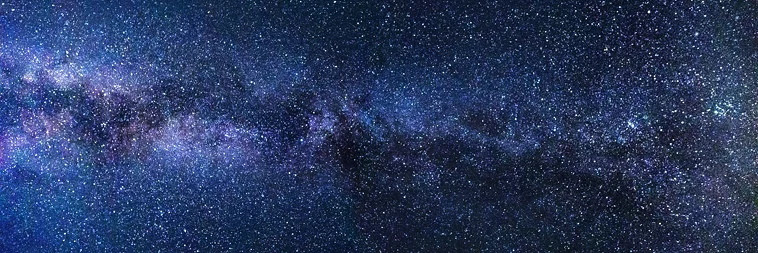
The night sky displays impressive objects like planets, constellations, and a stunning array of stars. In 1840, photographers figured out how to capture the stars on film. By leaving the camera’s shutter open for an extended period, more light is absorbed. This creates an exposure that captures the entire dynamic range of the digital camera sensor or film. A camera that sits stationary for an extended period, while the shutter is open, can capture a vibrant and clear photograph. To photograph the night sky, you will need some special camera features. There are also cameras specifically designed for amateur astrophotography based on commercially available imaging sensors. They may also allow the sensor to be cooled to reduce image noise in long exposures, provide raw image readout and to be controlled from a computer for automated imaging.
Capturing Star Trails
The earth’s rotation makes the stars, planets, and the moon appear to move across the sky all night long. In addition, the moon and planets also have their motions. Compared to taking photos during the daytime, the objects in the night sky appear dim. In order to gather enough light to see them, the camera needs to utilize a longer exposure time. When you photograph a star and do not compensate for the motion, you are creating a picture with a star trail. By ignoring the Earth’s rotation, you can capture a star trail by using a camera capable of long exposure.
The camera will need to have exposure settings from 30 seconds to several hours. Select a dark location away from city lights if possible. Include something interesting in the foreground (such as the trees above) to give scale to the image and to help show the sky’s apparent rotation against the earth.
To photograph a star trail with minimal “trail,” you will want to put your camera on a tripod and point it at Polaris, or the North Star. The earth rotates on its axis at about 1/2-degree per minute. Open the shutter and allow the Earth’s rotation to create the trail on the photograph. Longer exposure times equals longer trails.
Quick Tips:
• Use a sturdy tripod. Secure it in place to avoid wavy star trails.
• Use a fairly wide-angle lens for best results. Do some research to find out which wide angled lens will work best for your camera.
• Choose a medium-speed film or a digital-camera ISO of 400-800. This will help reduce grain and enhance your ability to capture dim stars.
• Use the power cable for your camera. Holding the shutter open will quickly drain any batteries, even brand new batteries.
Fixed Position Star Images
To reduce the “trail” effect, you will need to change a couple of the settings on the camera. The stars mover 1/2 degree per minute across the sky. Using a wide-angle lens with a reduction in open shutter time will diminish the “trail” effect. Since you cannot control the movement of the Earth under your feet, stars will still trail, but not noticeably in the photograph.
Urban astrophotographers use special light-pollution or narrow-band filters and advanced computer processing techniques to remove the ambient urban light from the background of their images. They may also stick to bright imaging targets like the moon and planets. Another method used by amateurs to avoid light pollution is to set up or rent time, on a remotely operated telescope at a dark sky location.
The internet has a wealth of information on setting up your camera and other helpful tips for capturing the night sky. Have fun and enjoy the experience.