
How to Make Your Own Snow Globe
There is just something about a Christmas snow globe that I can’t resist. Everytime I see one I feel compelled to give it a vigorous shake. To my delight, I’m never disappointed with the gentle sprinkling of “snow” or glitter that showers down on the figurine inside. However, strangely enough, I don’t actually own one of these orbs-of-entertainment… until now. And the best part is I made it myself and so can you!
Check out my easy to follow, do-it-yourself tutorial on homemade snow globes. This is a great way to get exactly the look you want, without spending huge dollars at a department or gift store. Plus, it is so easy, your older kids can also join in the fun – they make great gifts for teachers, grandparents and friends.
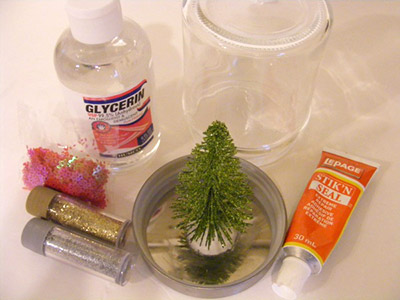
Snow globe ingredients
Snow globe ingredientsWhat You Need
These are the ingredients for your very own snow globe:
- jar with tight fitting lid
- waterproof sealant or glue
- waterproof figurine/ornament
- glitter
- glycerine
- distilled/bottled water
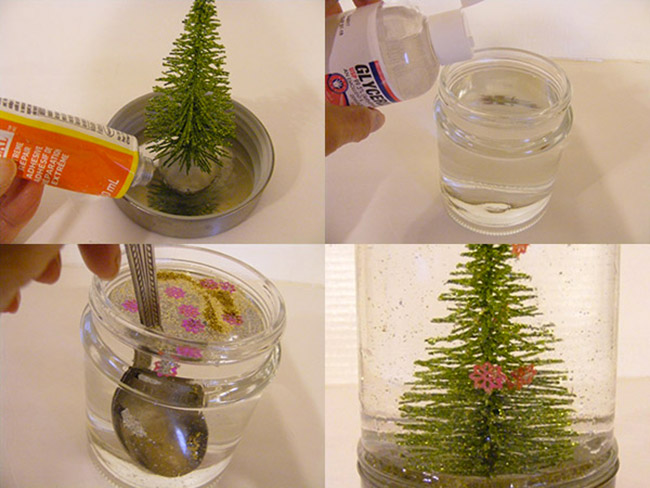
Step 1
Take the ornament or figurine you have chosen for your globe and add your sealant or waterproof glue to the bottom. Place it firmly onto the inside middle of your jar’s lid. Let it dry according to the instructions on your sealant/glue package. Note; before you glue your ornament down, be sure that the jar will close securely over it.
Step 2
Once the glue is dry, fill up your jar with distilled or bottled water. Add a couple of drops of glycerine to the water and mix well.
Step 3
Drop in a good amount of glitter – the more you have the more snow will fall. Stir.
Step 4
Finally take the lid and screw it tightly onto the jar. Turn upside down and watch the snow slowly float to the bottom. You may have to take the lid off and add more water to prevent an air bubble at the top. Once you are satisfied with your globe, you can take the lid off again, dry around the rim of both the jar and lid, then add more sealant. For my example, I went around the rim of the jar then added the lid. Twist it as hard as you can and leave it for 24 hours upside down. This will ensure your snowglobe will remain leak free.
For added flair, you can also decorate the back of the jar with paper or stickers and add a bow.
Creating your own snow globe is fun!
Creating your own snow globe is fun!More Homemade Snow Globes
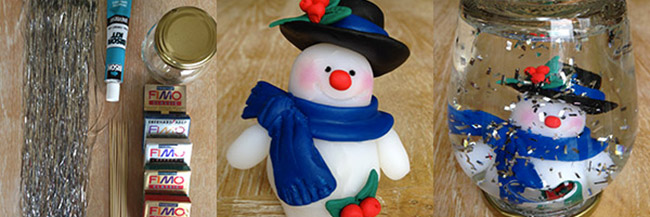
Homemade snow globes are extremely simple and an inexpensive way to give a thoughtful gift. They are perfect for the hard-to-buy for person and can be personalized with their favorite colors, hobbies or interests – you are only limited by your imagination. How about this cute snow man snow globe?
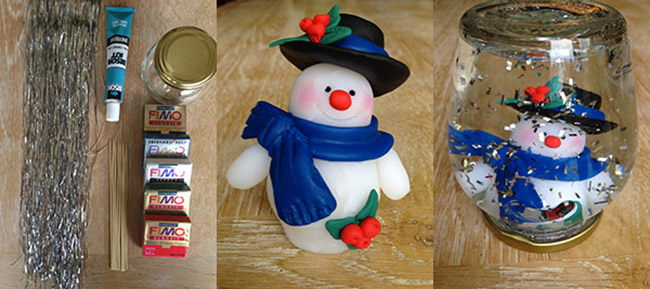
Cute!
Cute!Watch the YouTube video for a variation on how to make a Christmas snow globe:
https://youtu.be/eu3IchlRGlE
Have a Merry DIY Christmas Snowglobe and let the glitter flurries begin!